REVERSE ENGINEERING
This process serves a number of industries and can include the following components:
Obsolete Parts
Make drawings for parts that no longer are made or otherwise cannot be obtained. An old part or any remaining spare part can be scanned with the end result being a drawing that can be used to fabricate and/or machine the components.
Failing Parts
Upgrade parts that are causing failures for a specific industry. This is effective where you may use a machine outside the original design intent and the OEM is not interested in offering help to solve the problem with the failing component(s).
Quality Control
The scanner can do first article inspections (FAI) for components or lots of components to confirm the as-built parts match the original design without having to do exhaustive measurements, especially on complicated components or organically shaped items.
The Process
The most important thing for estimating and completing a project is knowing what the customer wants to do with the 3D data. The general 3D scan process applies for reverse engineered parts. Below we go over the steps of scanning that leads to reverse engineering parts for a project.
Step 1: Scan the part. The scanner uses reflective targets to position the unit and communicate with the 3D camera on the scanner. These do not impact the accuracy of the scan. The targets can be placed on the part or on a separate target board for smaller or delicate items. They are designed to follow the contour of the component and are removed in the post-processing step.
Step 2: Post- Processing: This part of the process involves the data compiling and then constructing the cross section features in the software. This data is used to re-create the part in a 3D modeling software (Solidworks).
Step 3: Re-creation of the model: Using the post-processed data, the 3D scanned model is re-created as a solid model. This is a feature driven process where each feature is re-created so the drawing is accurate. The 3D model can be overlaid with the scan data to confirm conformance.
Step 4: Make the 2D drawing. This process is the same process as the standard 3D to 2D process where dimensions and tolerances are added onto the 2D drawing.
This process is different if you are using the scan data to build “around.” For example, if you have an F550 chassis and you are putting a camper or other truck body on the back, you do not need to have the chassis reverse engineered. The approach is different because you only need to know where things are located. The STEP File generated during the post-processing step may be sufficient and thereby reducing the cost.
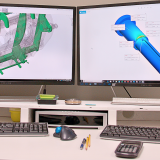
Calculations and Finite Element Analysis (FEA)
FEA is the industry leading approach to analyzing complicated components, assemblies, and structures. Hand calculations are always used when it is more efficient to gain results without doing FEA. FEA is done when there are organically shaped surfaces or items that would be time and cost prohibitive to perform hand calculations. Setting up an FEA should only be done by trained Professionals. The results are only as good as the inputs. The inputs and constraints drive results that could significantly change the cost and direction of a project. Knowing this, the system is always discussed thoroughly with the customer to understand the desired outcome and associated standards (ASTM, ISO, SAE, ASME) to the pertinent design. Other methods of calculation used include a combination of hand calculations and excel calculations for making modifications to the calculations quicker.
Real World Examples
- Body-buildup: Manufacturers such as Ford, Daimler, Chevrolet, RAM, etc build cab chassis for body upfitters to add packages from 5th wheel bodies to ambulance and RV packages. The 3D scanner can capture the chassis and cab sections allowing you to integrate the body onto the truck before ever investing in expensive vehicles. This scan shows where all the components are located and reduces the risk associated with interference between components.
- Mold design and modifications: Molds and/or tooling are often updated on the fly during development. The scanner can accurately locate the added features after the modifications are made. The scanner can also be used to validate the tooling is build to the CAD model by overlaying the original CAD model to the scanned model.
- Scanning clay molds: This can be done to develop body work or integrate drivetrain. The clay mold can be scanned, scaled, then the remainder of the application be integrated into the model. This can be prep work for machining a mold or making a larger model.
- Archeology Preservation & Data Capture: Artifacts are often delicate and need to be reconstructed with other parts from a dig site. The scanner can obtain the geometry of these artifacts to help re-assembly in the computer, preserving the artifact for later generations.